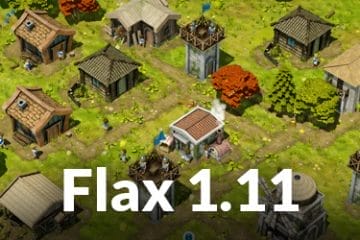


Creating Retro Visual Effects in Unity: A Comprehensive Guide
Transform Your Modern Game into Pixel Art Paradise
Key Takeaways:
- Creating pixelated effects in Unity is surprisingly easy using render textures
- Scanning lines and noise effects add authentic retro feel to your game
- Custom shaders can be implemented without advanced coding knowledge
- Post-processing effects like vignette and lens distortion enhance the vintage aesthetic
- These techniques work for any game style but are perfect for metroidvania or platformer games
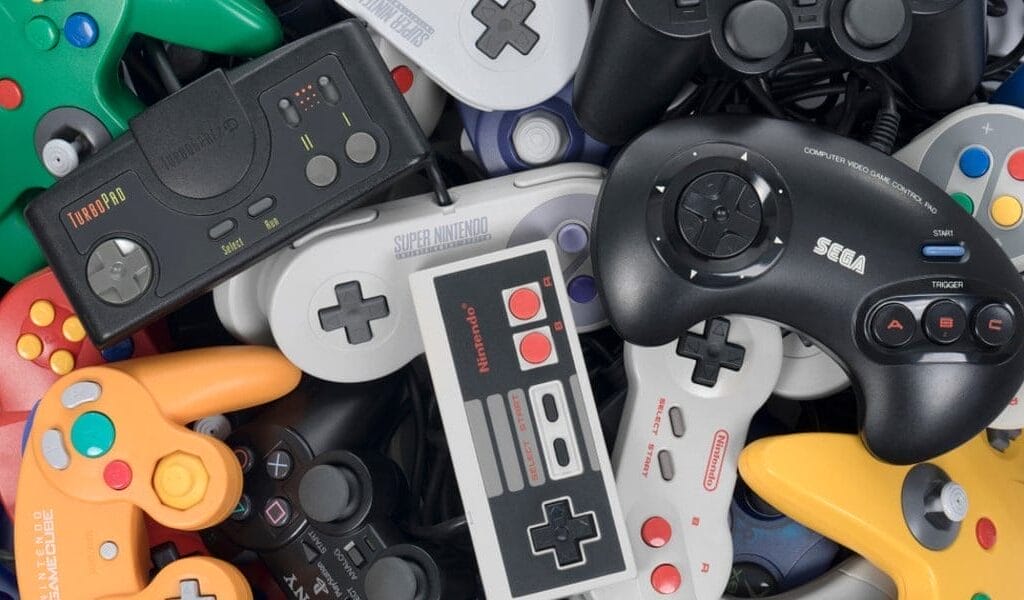
There’s something magical about retro games. The pixelated graphics, scanning lines, and vibrant colors take us back to a simpler time when games were challenging but charming. If you’re developing a game and want to capture that nostalgic feel, you’re in luck! Unity makes it surprisingly easy to transform modern graphics into pixel art paradise. Let’s dive into how you can create these effects for your next game project. 🕹️
Why Go Retro?
Before we jump into the technical details, let’s talk about why you might want to give your game a retro makeover. Pixel art isn’t just about limitations—it’s an artistic choice that brings distinctive character to your game.
Retro-style games have been making a massive comeback. Titles like “Stardew Valley,” “Shovel Knight,” and “Celeste” prove that players love the nostalgic feeling of pixel art combined with modern gameplay mechanics. The style is instantly recognizable and carries a certain charm that high-definition graphics sometimes lack.
Plus, there’s a practical benefit: pixel art can be less resource-intensive than highly detailed 3D models, making your game run smoother on a wider range of devices.
The Pixelation Process
Setting Up Your Camera
The first step to achieving a retro look is making everything pixelated. Surprisingly, this doesn’t require changing all your assets—you can transform an entire scene into pixel art with just a few steps:
- Find your main camera in the scene
- Look for the “Output” section in the camera component
- Create a render texture (right-click → Create → Render Texture)
- Name it “PixelatedRenderTexture” or something similar
- Assign this texture to the camera’s output
At this point, your camera will paint everything it sees onto this texture. You might notice a “No camera rendering” warning in your game window—don’t worry! You can disable this warning in the three-dotted menu icon.
Displaying Your Pixelated View
Now that your camera is rendering to a texture, you need to display this texture on screen:
- Create a UI canvas in your scene
- Add a Raw Image (UI → Raw Image)
- Rename it to “PixelatedRawImage” for clarity
- Assign your “PixelatedRenderTexture” to this raw image
To make sure the image covers the entire screen:
- Select the raw image
- Click on the “Anchor Presets” button in the Inspector
- Hold Alt and click on the center preset
- While still holding Alt, click on the bottom-right corner preset
This will expand your raw image to fill the entire screen. Now, everything your camera sees will be displayed through this texture!
Controlling the Pixelation Amount
The magic happens when you adjust the settings of your render texture:
- Select your “PixelatedRenderTexture” asset
- Change the size to control pixelation (smaller = more pixelated)
- Try values like 128×128 for strong pixelation
- 256×256 for a moderate effect
- 512×512 for subtle pixelation
- Set the “Filter Mode” to “Point” for crisp pixels
- Change “Anisotropic Level” to “None” to prevent smoothing
Play around with these settings to find the perfect pixelation level for your game. Too pixelated might make things unreadable, while too subtle might not achieve the retro look you want.
Advanced Retro Effects
Pixelation is great, but to truly capture that authentic retro feel, we need to add more details like scanning lines and noise. This is where shaders come in.
Setting Up the Blit Render Feature
To apply shaders to your entire screen, you’ll need to:
- Find your Forward Renderer asset
- Go to Edit → Project Settings → Graphics
- Look for the Universal Render Pipeline asset
- Check the Renderer List for the Forward Renderer
- Add a “Blit” render feature
- You might need to add Cyan’s Blit script to your project
- You can copy the entire file and create a C# script in Unity
- Paste the code and save
Once the script is compiled, you can add the Blit render feature to your Forward Renderer and name it “RetroBlit”.
Creating a Retro Shader
Now for the fun part—creating a shader that will add scanning lines and noise:
- Right-click in your Project window
- Create → Shader Graph → Blank Shader Graph
- Name it “RetroShader”
- Double-click to open it
In the Graph Inspector, set it to “Universal” and “Unlit”. Now we’ll add two main effects: scanning lines and noise.
Adding Scanning Lines
Scanning lines are horizontal lines that scroll up your screen, mimicking old CRT monitors:
- Add a UV node
- Split it to access the green (G) channel
- Connect to a Multiply node
- Connect to a Fraction node to create repeating lines
- Create a Float property called “ScanningLines” with a default value of 7
To make the lines black and white:
- Connect to a Step node
- Set the threshold to about 0.23
To animate the scanning lines:
- Add a Time node
- Multiply it by a Float property called “ScanningLineSpeed” (default: 1)
- Add this to your line calculation before the Fraction node
Now we need to blend these lines with our scene:
- Add a Scene Color node (represents what the camera sees)
- Add a Lerp node
- Connect Scene Color to the A input
- Connect scanning lines to the B input
- Create a Float property “ScanningLinesAmount” (slider 0-1)
- Connect this to the T input of the Lerp
For extra realism, make the scanning lines blink:
- Add a Sine Time node
- Multiply by 10-15
- Remap to control the intensity (clamp from 0.6 to 1)
- Multiply with your scanning lines
Adding Noise
To add that grainy, static effect:
- Add a Simple Noise node
- Create properties:
- “NoiseAmount” (slider 0-1)
- “NoiseScale” (default: 100)
- “NoiseSpeed” (Vector2)
- Connect Time × NoiseSpeed to a Tiling and Offset node
- Feed this into the UV input of the Simple Noise
- Use another Lerp node to blend the noise with your scanning lines
Adding Color
For that classic green or amber monitor look:
- Create a Color property
- Multiply your final Lerp with this color
- Connect to the Base Color output
Save your shader and create a material from it. Assign this material to your RetroBlit render feature.
Fine-Tuning Your Settings
For a subtle, authentic look, use these values:
- ScanningLinesAmount: 0.05 (just enough to notice)
- NoiseAmount: 0.02 (very subtle)
- NoiseScale: 100 (good default)
- NoiseSpeed: 0.05 or less (slow movement)
- Color: For green phosphor monitors, try RGB(109, 255, 43)
Enhancing with Post-Processing
To add final touches like vignette (darkened corners) and distortion:
- Create a Global Volume in your scene (right-click → Volume → Global Volume)
- Create a new profile
- Add a Vignette effect
- Intensity: 0.3-0.4
- Smoothness: 0.2-0.3
- Add a Lens Distortion effect
- Intensity: 0.1-0.2 for subtle fishye effect
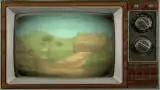
These effects mimic the curved glass of old CRT monitors and add depth to your retro aesthetic.
Real-World Application
Let’s look at how these techniques can transform a game. Imagine you’re developing a metroidvania platformer (a game combining exploration elements of Metroid with the platforming of Castlevania).
Your modern Unity scene might look clean and sharp, with smooth lighting and detailed textures. After applying the pixelation, scanning lines, noise, and post-processing effects, it transforms into something that could have been released on the Super Nintendo or Sega Genesis—but with the smooth performance and flexibility of a modern engine.
This retro styling works particularly well for:
- Side-scrolling platformers
- Top-down RPGs
- Roguelikes
- Puzzle games
- Shoot-em-ups
Case Study: Creating a Retro Platformer
Let’s imagine we’re working on “Cosmic Jumper,” a side-scrolling platformer with sci-fi elements. Here’s how we’d implement our retro effects:
- Base Game: First, we develop the core mechanics and level design using standard Unity assets.
- Pixelation Level: Since this is a platformer where precision matters, we’d use a moderate pixelation (perhaps 256×256) so players can still clearly see enemies and platforms.
- Color Palette: We’d use a limited color palette reminscent of the 16-bit era, with vibrant blues for our cosmic theme.
- Scanning Lines: For an authentic arcade feel, we’d set the scanning lines amount to 0.04 and speed to 0.8.
- Noise: Just a touch of noise (0.015) adds that CRT static feel without being distracting.
- Post-Processing: We’d add moderate vignette (0.35) and slight lens distortion (0.15) to complete the look.
The result? A game that feels like a lost classic from the 90s, but with modern gameplay innovations and performance.
Common Mistakes to Avoid
When creating retro effects, there are some pitfalls to watch out for:
1. Overdoing the Effects
Too many scanning lines or too much noise can make your game unplayable. Remember that the original games had these limitations, but they weren’t designed choices—developers worked around them. Start subtle and increase only if needed.
2. Inconsistent Pixel Sizes
If you’ve created pixel art assets, make sure their native resolution matches your camera’s pixelation level. Mixing different pixel sizes breaks the illusion and looks unprofessional.
3. Modern Lighting with Retro Graphics
Some modern lighting effects don’t translate well to pixelated graphics. Consider simplifying your lighting or using flat shading for a more authentic look.
4. Forgetting About UI
Don’t forget to apply retro styling to your UI elements too! Nothing breaks immersion faster than pixelated gameplay with modern, crisp menu elements.
Advanced Techniques
For those wanting to take their retro effects even further, consider these advanced options:
Color Banding
Older systems had limited color palettes. You can simulate this by:
- Adding a Color Banding node to your shader
- Reducing the number of color steps (8-16 for 8-bit look)
Dithering
Dithering was used to create the illusion of additional colors by alternating pixels:
- Create a custom dithering pattern
- Apply it using a shader based on screen position
CRT Curvature
For the ultimate CRT look:
- Add more aggressive lens distortion
- Consider a custom shader that warps the edges of the screen more than the center
Retro Sound Effects
Don’t forget that sound is a huge part of the retro experience:
- Use 8-bit or 16-bit sound effects
- Consider chiptune music or FM synthesis
- Add subtle audio distortion to match your visual style
Performance Considerations
While these retro effects generally have a low performance impact, there are some things to keep in mind:
- Render texture resolution affects performance—lower resolutions (more pixelated) actually run faster
- Complex post-processing effects can slow down mobile devices
- If you’re targeting very low-end hardware, consider baking some effects into your assets rather than applying them at runtime
Customizing for Different Eras
You can adjust these techniques to emulate different gaming eras:
8-bit (NES, Master System)
- Very low resolution render texture (128×120)
- Limited color palette (16-56 colors)
- Minimal scanning lines
- Chunkier pixels
16-bit (SNES, Genesis)
- Medium resolution (256×224)
- Expanded color palette
- Moderate scanning lines
- Some basic transparency effects
Early 3D (PlayStation, N64)
- Low-poly 3D models
- Texture warping
- Visible polygon edges
- Fog to hide draw distance limitations
Putting It All Together
When you’ve implemented all these effects, take a step back and evaluate the overall look. Does it capture the era you’re targeting? Is it consistent? Most importantly, does it enhance your gameplay rather than distract from it?
Remember that retro styling is about more than just technical effects—it’s about creating a cohesive visual language that players recognize and enjoy. The most successful retro-styled games use these techniques in service of great gameplay, not as a gimmick.
Conclusion
Creating retro visual effects in Unity is surprisingly accessible, even for developers without extensive shader knowledge. By combining pixelation, scanning lines, noise, color adjustments, and post-processing, you can transform any modern game into a nostalgic experience that captures the magic of gaming’s golden eras.
Whether you’re developing a metroidvania, platformer, or any other style of game, these techniques can add character and charm that stands out in today’s market. The key is finding the right balance—enough retro elements to create nostalgia, but not so many that your game becomes frustrating to play.
So fire up Unity, experiment with these settings, and transport your players back to a time when pixels were big, colors were bold, and games were challenging but unforgettable. Happy developing! 🎮
Retro Effect Tutorial with Unity Tutorial chapters
00:42 Intro
00:42 Pixelated Camera
03:03 Cyan Blit Render Feature
04:21 Retro Shader – Scanning Lines
10:08 Retro Shader – Adding Noise n Color
12:45 Post-Processing Effects
13:22 End Result
RETRO PROJECT FILES:
https://www.patreon.com/posts/unity-s…
OR HERE:
https://www.gabrielaguiarprod.com/pro…