
in this tutorial, we will cover for the Screen Space Refraction Tutorial applied to glass and water with the help of shadergraph
[ad_1]
Screen space refraction is a powerful shader technique for creating realistic refractive materials in real-time graphics. Compared to tangent space refraction, screen space refraction can give more accurate results by avoiding issues with inaccurate tangent space calculations.
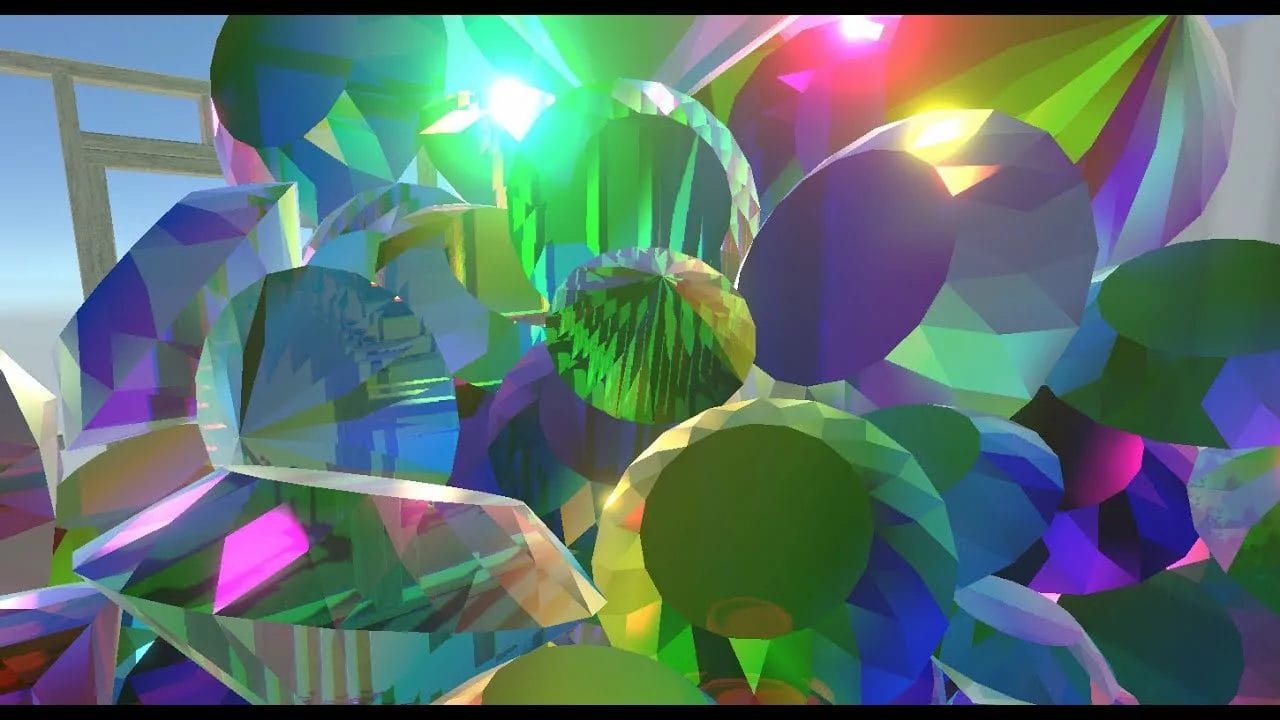
In addition, screen space refraction enables appealing graphical effects like chromatic aberration as the color channels split from refractive distortion. This tutorial will provide an in-depth guide to implementing screen space refraction in shader graphs and getting the most out of its capabilities.
Contents:Screen Space Refraction Tutorial
Video Screen Space Refraction Tutorial
How Refraction Works
Before diving into screen space refraction specifically, let’s briefly go over how refraction works in general.
The Refraction Equation
When light passes from one medium to another with a different index of refraction, it gets bent according to Snell’s law:
n1 * sin(θ1) = n2 * sin(θ2)Where:
- n1, n2 are the indices of refraction for each medium
- θ1, θ2 are the incident and refracted angles
This causes distortion effects like when looking at objects under water. The amount of refraction depends on the ratio between the two indices of refraction.
Refracting the View Vector
To achieve refraction in CG, we can calculate a refracted view vector using the normal vector and index of refraction.
Given:
- V – the view vector from the camera to the shaded pixel
- N – the normal vector at the point on the surface
- IOR – the ratio of indices of refraction
We refract V like so:
R = refract(normalize(V), normalize(N), IOR)This refracts V based on the normal N and IOR ratio to get the new refracted vector R.
We can then use R to displace or distort the pixel, creating the refractive effect.
Why Screen Space Refraction?
Screen space refraction refers to performing the refraction calculations in screen space after vertex processing, as opposed to tangent space refraction which calculates refraction per-vertex on the mesh.
Screen space refraction has two major advantages:
- It avoids inaccuracies from tangent space distortions.
- It enables additional effects like chromatic aberration.
Issue with Tangent Space
Tangent space refraction can cause inaccuracies due to the nature of tangent space itself.
Tangent space is defined per-vertex based on the local surface normal and texture coordinates. This means tangent bases can become distorted, especially with lower poly meshes.
When refracting in tangent space, these distortions get translated into the refraction bending, causing obvious visual artifacts at times.
By using the exact view and normal vectors in world space for the refraction calculations, screen space refraction avoids any such inconsistencies from tangent space.
Chromatic Aberration Effects
With screen space refraction, we have access to the view vector from the camera to the exact pixel being shaded. This enables effects that are not possible in tangent space.
A common use case is splitting the color channels to create chromatic aberration. Here’s how it works:
- Perform refraction 3 times with different indices of refraction
- Take the R channel from the first refraction
- Take the G channel from the second refraction
- Take the B channel from the third refraction
- Combine into final pixel color
This splits the channels based on the refractive distortion, creating rainbow-like effects around edges and contours.
The amount of distortion depends on the differences between the refractive indices used. Subtle amounts can add realism while larger amounts create stylistic effects.
Overall, screen space refraction gives us more accuracy and flexibility compared to tangent space techniques.
Implementing Screen Space Refraction
Now let’s go over how to set up screen space refraction in a shader graph. We’ll build the graph step-by-step and cover the key nodes involved.
Refraction Nodes
First we need a way to actually calculate the refraction effect. For this, we can use a custom refraction node.
There are a few ways to create a refraction node:
- Implement refraction logic in code via a Custom Function node
- Use a pre-made refraction node from the Asset Store
- Code your own refraction HLSL shader and expose it through a Custom Function node
As long as it refracts a view vector based on a normal and IOR ratio, the implementation can be tailored to your specific needs.
For this tutorial, we’ll use a simple Custom Function node:
void refract_node(float3 viewDir, float3 normal, float ior, out float3 refractDir)
{
  refractDir = refract(normalize(viewDir), normalize(normal), ior);
}
This takes in the view and normal vectors with the IOR ratio and outputs the refracted vector.
Additional Nodes Needed
To calculate refraction, our node needs:
- View direction
- Normal vector
- Index of refraction
The View Direction node gives us the vector from the camera to the currently shaded pixel.
The Normal Vector node outputs the interpolated mesh normal at the pixel.
Index of Refraction can be set via a Vector 1 property. Typical values are:
- Air: 1.0
- Water: 1.33
- Glass: 1.5
- Diamond: 2.4
Higher values give more refraction bending.
Transform to Screen Space
With the refracted vector, we need to transform it into screen space.
This is done by converting to clip space with the View Projection matrix, then converting from clip space to screen space with the Screen Position node.
The key steps:
- Split refracted vector into components
- Set W to 1.0
- Multiply by View Projection matrix to get clip space
- Use Screen Position node to convert to screen space
- Divide X,Y by W to get final screen position
This transforms the refracted vector into the corresponding screen location for shading.
Sample Scene Color
With the refracted screen position, we can now sample the scene color at that location to achieve the refraction effect.
The Scene Color node samples the scene color buffer at the given screen space coordinates.
By displacing to the refracted coordinates, it will grab the pixel color from the refracted direction rather than the actual view direction.
This allows us to warp and distort the scene without having to render inverted or handle screen transforms manually.
Putting It Together
The full node graph:
- View Direction
- Normal Vector
- Index of Refraction
- Custom Refraction Node
- View Projection Transformation
- Screen Position Conversion
- Scene Color Sampling
Feeding the refracted vector through the screen space transform before getting the scene color gives the desired refractive effect with minimal nodes.
Enhancing the Effect
With the core refraction logic in place, there are some common enhancements to build on top of it.
Normal Mapping
For more detailed refraction, a normal map can be used instead of the interpolated mesh normal.
This captures high frequency surface details that can better distort and warp the refraction.
To incorporate a normal map:
- Sample normal map texture
- Unpack normal so components range from -1 to 1
- Blend between normal map and mesh normal
- Use result as the normal input to refraction
Blending with the mesh normal prevents distortion from smoothing out the large surface shape.
Chromatic Aberration
As discussed earlier, splitting the color channels creates rainbow dispersion effects around edges:
- Add two more refraction nodes
- Increment index of refraction for each
- Split color channels – R, G, B
- Combine into final color
Start with a subtle 0.1 increment in the IOR ratio between each one. Increase the gap for stronger effects.
Distortion Overlay
For surfaces like water, it helps to mix in an animated distortion texture to fake small ripples and waves.
- Sample a scrolling distortion texture
- Use texture to displace UV coordinates
- Sample scene color at displaced UV
- Blend distortion texture over final image
This adds animated wave distortion on top of the refraction for a more convincing water material.
Optimization Considerations
Screen space effects can get expensive, especially at higher resolutions. Here are some tips for optimizing performance:
- Render at lower resolution – refraction is noisy so can hide banding well
- Limit the effect to certain rendering passes only
- Add distance-based fade out to avoid over-shading in background
- Sample scene color less frequently and cache between pixels
- Avoid sampling depth texture multiple times per pixel
- Reduce normal map sampling rate
Example Scenes
Let’s look at a couple examples of screen space refraction used in different contexts.
Underwater Scene
For underwater effects, screen space refraction is applied to anything viewed through the water surface.
Some key points:
- Use a high index of refraction value like 1.33
- Ensure the water surface normal faces upward
- Only enable effect when camera is under the water plane
- Add distortion noise and caustics textures for realism
This creates a convincing underwater look with wavy refraction and caustics lighting effects.
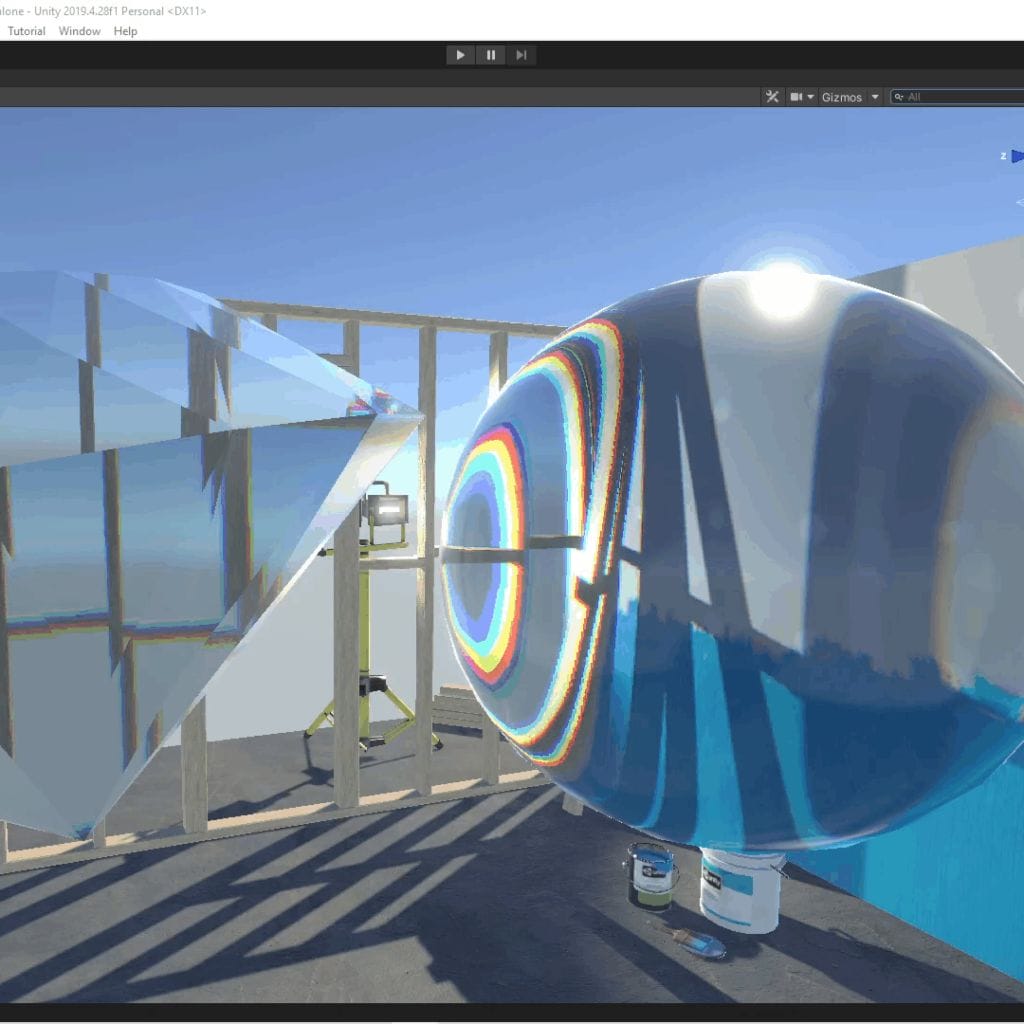
Glass Ball
For solid glass objects, the normal map capturing scratches and smudges can really enhance the refraction.
Tips:
- Use normal map for lots of nuanced distortion
- Soften normal map to prevent overly distorted smearing
- Add chromatic aberration for glass tinting
- Use sphere or cube mapping for reflections
With meticulous normal map design, very believable solid glass can be achieved.
Future Improvements
Some potential enhancements that could be explored:
- Ray marched refraction for true volumetric effects
- Ambient occlusion to darken refraction in crevices
- Model dispersion by wavelength for even more realistic CA
- Masking outsampling areas to prevent self-reflection
- Hybrid methods combining screen and tangent space
As graphics power increases, more accurate physical camera effects will become viable in real-time.
Conclusion Screen Space Refraction Tutorial
To wrap up, here are some key takeaways:
- Screen space refraction avoids tangent space distortion issues
- Gives more flexibility for effects like chromatic aberration
- Implement by refracting view vector then transforming to screen space
- Enhance with normal mapping, distortion, and color channel splitting
- Many options for optimization to maintain performance
- Can create convincing refractive materials like glass & water
This covers the fundamentals of screen space refraction in shader programming. The techniques discussed can help you enhance your real-time graphics with realistic and stylized camera effects.
For more in-depth coverage of advanced shader programming, check othe Shader Programming Guide book. It goes into much more detail on topics like this with extensive code examples.
I hope you found this tutorial helpful. Let me know if you have any other subjects you’d like covered!
You can find more articles about shader programming on my blog
[ad_2]
: A Comprehensive Guide to Implementation and Best Practices")


